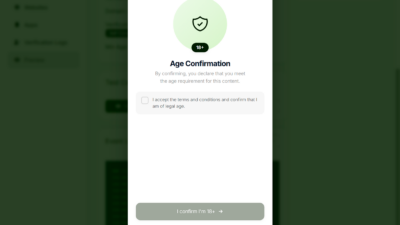
Here’s the question we get every week: “How long does this actually take to implement?” Shorter than you’d think. A well-designed age wall shouldn’t be a two-sprint project for your dev team. It should be a script tag, an ID, and a configuration decision.
This guide gets straight to it: what an age wall is, how to pick the right method, and above all, how integration actually works across a website, an app, and a Telegram, Discord, or WhatsApp bot. Code examples included.
What is an age wall, exactly?
An age wall is the layer that sits between a user and restricted content, a product, or a gated area until that user confirms they meet the required minimum age. It can be as simple as a self-declaration button or as robust as biometric age estimation with Face AI. The difference isn’t in the concept it’s in the friction level and the level of certainty your use case actually needs.
Before touching a single line of code, there’s one question worth answering: what level of verification does your product require?
- Self-Consent: one click, zero friction, ideal as a first layer for forums, general content, or site entry gates.
- Face AI: age estimation from a video selfie, no document upload, result in about 10 seconds. The default for gaming, streaming, social apps, and messaging bots.
- Verify AI: document plus face match combined, for the highest-risk scenarios.
The good part: they all share the same integration. You switch methods in the configuration panel, not in your code.
The quick guide: 4 steps, any platform
- Create your account and get your Verifier ID. Sign up on the AgeCheckPRO dashboard, add your site or app, and copy the unique ID (
v_xxxxxxxxxxxxx) that gets generated automatically. - Choose your verification method in the panel: Self-Consent, Face AI, Document AI, or Verify AI. You can change it later without re-integrating anything.
- Drop in the script or call the API, depending on your platform (examples below).
- Test in Preview mode before verifying your domain and going live.
That’s the whole process, quite literally. No servers to spin up, no infrastructure to maintain everything runs on AgeCheckPRO’s side.
Example 1: integrating it on a website
For most sites (WordPress, Shopify, plain HTML), the JavaScript SDK is the fastest path. Paste it right before the closing </body> tag:
html
<script
    src="https://cdn.agecheck.pro/dist/v1/Verify.js"
    data-verifier-id="v_abc123xyz456789"
    data-mode="auto"
    async>
</script>
With data-mode="auto", the modal shows automatically on page load. If only one section needs the age wall say, checkout for age-restricted products use manual mode and trigger the modal yourself with the global window.AgeCheck instance the SDK creates:
html
<script
    src="https://cdn.agecheck.pro/dist/v1/Verify.js"
    data-verifier-id="v_abc123xyz456789"
    data-verification-type="face-ai"
    data-mode="manual"
    async>
</script>

<button id="checkout-btn" disabled>Proceed to checkout</button>
<button onclick="window.AgeCheck.show()">Verify your age</button>
To react to the result gating a checkout button, unlocking a video, whatever your flow needs listen for the agecheck:verification:complete event the SDK dispatches once a session finishes:
javascript
window.addEventListener('agecheck:verification:complete', function (event) {
  const { verified, reason } = event.detail;

  if (verified) {
    document.getElementById('checkout-btn').disabled = false;
  } else {
    console.warn('Age verification failed:', reason);
  }
});
If you ever need to check verification status outside that event for example, before rendering a restricted page the SDK instance exposes window.AgeCheck.isVerified().
Example 2: integrating it into an app
For mobile apps or custom backends where you want your own UI instead of the pre-built modal, the SDK still exposes the same building blocks through JavaScript you’re just calling them yourself instead of letting data-mode="auto" do it. A minimal custom flow looks like this:
javascript
// 1. Wait for the SDK to finish loading and initializing
document.addEventListener('agecheck:initialized', function () {
  // 2. Show your own "Verify age" entry point, then trigger the modal
  document.getElementById('verify-btn').addEventListener('click', function () {
    window.AgeCheck.show();
  });
});

// 3. React to the result from your own app logic
window.addEventListener('agecheck:verification:complete', function (event) {
  const { verified, reason } = event.detail;

  if (verified) {
    unlockAppContent();
  } else {
    showAgeGateBlocked(reason);
  }
});
No selfie and no document ever reaches your own server the SDK talks to AgeCheckPRO’s backend directly, and your app only ever sees the pass/fail result. That drastically simplifies your responsibility as a data controller.
Example 3: integrating it into a bot (Telegram, Discord, WhatsApp)
This is the case we get the most questions about, because the embedded browsers inside these apps block camera access. There’s no DOM for the SDK to run in your bot lives on a server, not a browser so the pattern is different: your bot’s backend talks to the API directly with plain HTTP requests, gets back a QR code and a mobile link, hands that to the user, and checks back periodically to see if they finished.
Step 1 create the session. Your bot calls the session endpoint and gets a QR code image plus a mobile URL back:
bash
curl -X POST https://cdn.agecheck.pro/api/self-consent/session/start/ \
  -H "Content-Type: application/json" \
  -H "X-Domain: yourbot.example.com" \
  -H "Authorization: Bearer YOUR_API_KEY" \
  -d '{
    "verifier_id": "v_abc123xyz456789"
  }'
A successful response looks like this:
json
{
  "success": true,
  "session_id": "sess_9f2a1b7c",
  "qr_image": "data:image/png;base64,iVBORw0KGgo...",
  "mobile_url": "https://app.agecheck.pro/m/sess_9f2a1b7c"
}
Step 2 hand it to the user. Your bot sends the qr_image (or just the mobile_url as a tappable link, which works better inside Telegram/Discord/WhatsApp) as a message. The user opens it in their phone’s regular browser not inside the messaging app and completes the verification there.
Step 3 poll for the result. Since your bot has no page open waiting for an event, it checks the session status directly:
bash
curl https://cnd.agecheck.pro/api/session/sess_9f2a1b7c/status/ \
  -H "Authorization: Bearer YOUR_API_KEY"
json
{
  "status": "completed",
  "verified": true
}
While the user hasn’t finished yet, status comes back as pending. Your bot polls this endpoint every few seconds after sending the link once it sees completed, it reads verified and either unlocks the restricted command/channel or tells the user they didn’t pass. Each session is single-use, so the same link or QR code can’t be reused to verify a second account.
That’s the whole shape of it: create a session, show the user a QR or link, poll until it resolves. No camera code, no liveness UI to build your bot only ever handles a session ID and a boolean.
Best practices to keep conversion intact
- Don’t block search engines. The age wall should still let Googlebot index your content normally.
- Remember verified users. Configure session persistence so they’re not asked to verify on every single visit.
- Start with the lightest method your regulation allows. Self-Consent as a first layer, Face AI when you need real certainty, Document AI or Verify AI only if your product actually requires it.
- Always test in Preview mode before going live, so you don’t break the experience for real users while you fine-tune the configuration.
A good age wall goes unnoticed. Legitimate users pass through in seconds, minors are kept out, and you offload the legal risk and the data liability that comes with requesting documents you don’t even need to store.
AgeCheckPRO is free to start. Self-Consent goes live in five minutes, and if your platform needs something more robust, moving to Face AI or Verify AI is a configuration change, not a new integration.